First of all, I didn’t post anything last week. The cause of it was that I went to one of the most “interesting” hackathon’s that I ever been, but that is a story for another day.
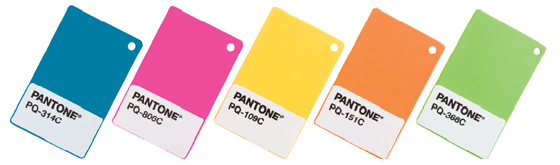
So, returning with the usual posts, have you ever seen those cards with color guides and names on it? Well, they are called Pantone color cards and are used as a standardized color matching system, and today we will use Pillow in order to create them out of their HEX values.
Introduction
Pantone LLC is a company headquartered in Carlstadt, New Jersey that is best known for its Pantone Matching System (PMS), a proprietary color space used in a variety of industries.
The PMS is largely a standardized color reproduction system that differs from the usual CMYK in its use of 14 base pigments that are mixed in specified amounts to obtain the final color.
Besides the PMS, another commonly used color spaces are the NCS System, Adobe RGB and sRGB, all of them based in the clasic combination of Red, Green and Blue (RGB colors model).
Getting started
First, be sure that you have Pillow installed in your computer. If not, you can easilly install it using pip:
pip install Pillow
Also, we will be working with a .json file that has all the Pantone colors and codes so be sure to download it from the blog’s github.
It was originally found in Margaret’s github page but I made some corrections in the HEX values.
And for the ones that don’t know what its JSON (JavaScript Object Notation), it is a lightweight data-interchange format based on the syntax of JavaScript objects that was created as a smaller and lighter alternative to XML for data transmission between a web-server and a client in a REST API and represents structured object data.
Getting data from our json file
The first step is read our .json file to get a color with a HEX code.
import json

# Set a hex code to find in the json file
hex_value = '676168'
name = ''
code = ''

# Read our json file and find a HEX value
with open('pantone_codes.json') as json_file:
	data = json.load(json_file)
	for pantone in data:
		if data[pantone]['hex'] == hex_value:
			code = pantone
			name = (data[pantone]['name'])
			break

# Show the code and name of the color
print(code)
print(name)
Building our card with the color and text found
Then, we will use Pillow to build an image of 200 pixels wide with the format of the Pantone cards.
In order to do this, we will create an image with the color and two others where we will draw the name and code, using ImageDraw. Then we will join them to form our card:
from PIL import Image, ImageFont, ImageDraw, ImageEnhance, ImageOps
import json

# Set a hex code to find in the json file
hex_value = '6f3c56'
name = ''
code = ''

# Read our json file and find a HEX value
with open('pantone_codes.json') as json_file:
	data = json.load(json_file)
	for pantone in data:
		if data[pantone]['hex'] == hex_value:
			code = pantone
			name = (data[pantone]['name'])
			break

# Set a font to write the code in the card
font = ImageFont.truetype("arial",24)
# Get the size of the text
code_size = font.getsize(code)
# Set button size + 5px height margins
button_size = (200, code_size[1]+10)
# Create an image with the button size and white background
code_img = Image.new('RGB', button_size, 'white')
# Draw the text on the image 10px margins
code_draw = ImageDraw.Draw(code_img)
code_draw.text((10, 5), code, font=font, fill='black')

# Repeat for the name
font = ImageFont.truetype("arial",20)
# You can also set a fixed size to avoid different letters sizes
button_size = (200, 23+10)
name_img = Image.new('RGB', button_size, 'white')
name_draw = ImageDraw.Draw(name_img)
name_draw.text((10, 5), name, font=font, fill='black')

# Create an image with the Pantone color
color_img = Image.new('RGB', (200,200), '#'+hex_value)

# Get the height of our Pantone card
total_height = color_img.size[1] + name_img.size[1]  + code_img.size[1]

# Create the Pantone card
new_im = Image.new('RGB', (200, total_height))
# Paste every part in it
new_im.paste(color_img, (0,0))
new_im.paste(code_img, (0,200))
new_im.paste(name_img, (0,200+code_img.size[1]))
#Draw a black border around
new_im = ImageOps.expand(new_im,border=2,fill='black')

# Show the Pantone card
new_im.show()
Getting a card with the code, name and color like this one:

Doing it for all colors
Also, we can repeat the same process to get a card for every color in our .json file:
from PIL import Image, ImageFont, ImageDraw, ImageEnhance, ImageOps
import json

hex_value = ''
name = ''
code = ''

#find the code and name in our json
with open('pantone_codes.json') as json_file:
	data = json.load(json_file)
	for pantone in data:
		hex_value = data[pantone]['hex'].replace(',','')
		code = pantone
		name = (data[pantone]['name'])

		# Build the name and code
		font = ImageFont.truetype("arial",24)
		code_size = font.getsize(code)
		button_size = (200, code_size[1]+10)
		code_img = Image.new('RGB', button_size, 'white')
		code_draw = ImageDraw.Draw(code_img)
		code_draw.text((10, 5), code, font=font, fill='black')

		font = ImageFont.truetype("arial",20)
		text_size = font.getsize(name)
		button_size = (200, 23+10)
		name_img = Image.new('RGB', button_size, 'white')
		name_draw = ImageDraw.Draw(name_img)
		name_draw.text((10, 5), name, font=font, fill='black')

		# Draw the color box
		color_img = Image.new('RGB', (200,200), '#'+hex_value)

		# Draw the card image
		total_height = color_img.size[1] + name_img.size[1]  + code_img.size[1]
		new_im = Image.new('RGB', (200, total_height))
		new_im.paste(color_img, (0,0))
		new_im.paste(code_img, (0,200))
		new_im.paste(name_img, (0,200+code_img.size[1]))
		new_im = ImageOps.expand(new_im,border=2,fill='black')

		# Save the image in a folder called cards
		new_im.save('cards/'+name+".jpg", "JPEG")
Getting a folder with all of our cards:

The full code used in these examples can be found in the blog’s github.
Conclusion
Pillow can not only be used to work and to edit existing images, it can also be used to draw and create new images.
Hopefully this simple example can show you the basics of how to use this library to create images and texts and then merge them to achieve more complex results.